Sunday, June 13, 2010

Chicken, Chicken, Chicken!


Chicken is definitely one of my favorite ingredients for thrifty cooking.  I don't make it that often though simply because between a half of a pig and 2/3 of a deer, we have plenty of meat around.  I finally made one last week and we ate it all week.  A free-range organic chicken from a health food store costs around 18 or so for a 6 lb chicken.  You can get them cheaper direct from the producer, but I called mine and he wasn't going to have any ready for a few weeks.  That may seem like a lot of money, and it is.  But I can feed our whole family off of that chicken for a week!  The first night we had roasted chicken with salad and something else (sorry, it has slipped my mind, kind of like the picture that was supposed to be here - oops).  I had to thaw the chicken out in the fridge for a few days first, but then I rinsed it, and took out the innards (heart, liver, neck, etc).  I put cut up a few cloves of garlic and finely chopped some fresh herbs from my garden (oregano, thyme and parsley) and mixed it all with 1/4 cup of softened butter.  Then I rubbed the chicken all over with this mixture and put it into a dutch oven.  I left the dutch oven uncovered and put it into a 400 degree oven for half an hour. Then I turned the temperature down to 275 and put the cover on.  We were gone all day - I put it in the oven around noon.  We got back around six.  I would have liked to have taken it out earlier, but that is the way it goes sometimes.  The meat was super tender and falling off of the bone.  


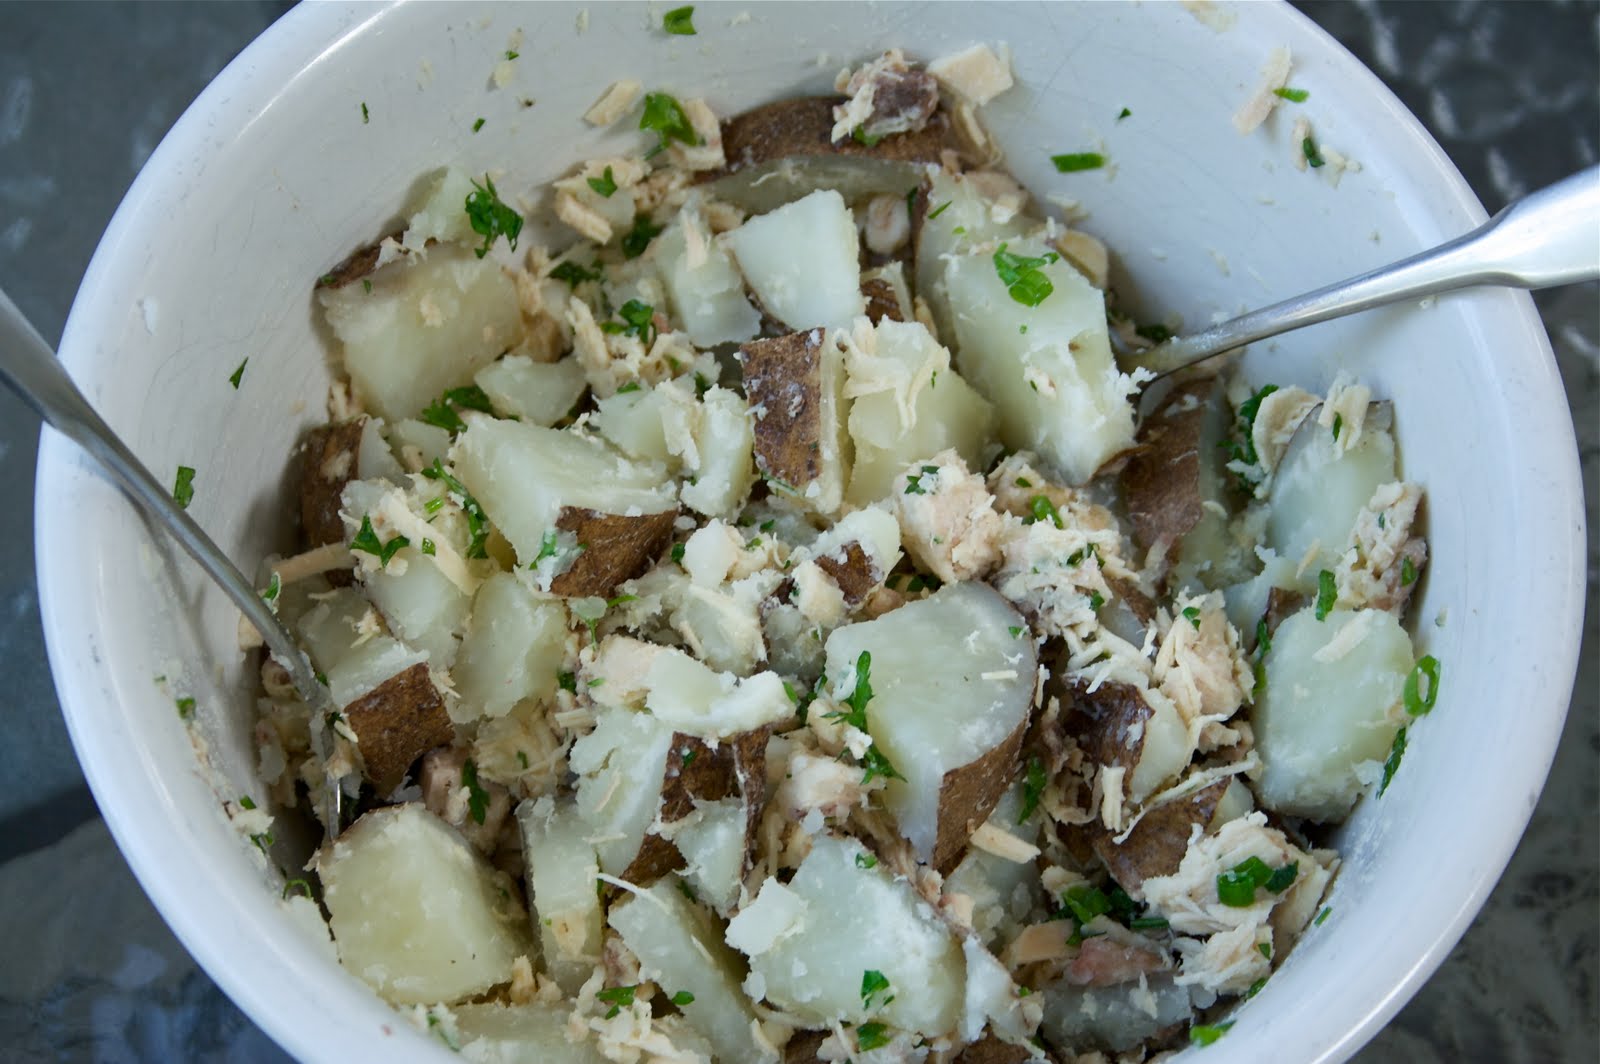
Anyway, the next night we had Cold Chicken with Potatoes and Anchovies.  This is a recipe that I got out of Hugh Fearnley-Whittenstall's 'River Cottage Meat Book'.  I know that I have mentioned before that he is one of my favorite chefs and cookbook authors. He has a whole chapter on Meat Thrift.  He lists a bunch of recipes for leftover meats.  This one was awesome.  I tried a bunch of new ones this time, just for something different. 


Cold Chicken with Potatoes and Anchovies

This worked out well because I used the rest of the tin of anchovies in the next recipe.

About 2 cups of roughly chopped chicken. 
1/2-1 tin of anchovies, chopped
1 clove of garlic, minced
1 winter onion/scallion
Lemon juice
3 medium potatoes, Hugh suggests a waxy potato, like Pink Fir Apple, but I just used some Russets and it worked out just fine.
a handful of parsley, chopped

Combine first five ingredients with about a TBL of olive oil, ideally from the anchovy tin, but regular olive oil works.  Let the flavors blend while you boil the potatoes until easily pierced with a fork.  Slice while they are still warm and toss with the chicken mixture and the chopped parsley.  This was a hit at my house!


The next night was Chicken with Olives, another of Fearnley-Whittenstalls brilliant leftover creations.  This one came out of 'The River Cottage Cookbook'.  He lists his top three leftover chicken recipes.  Yay!  This one Jake wasn't so wild about but the girls loved.  

Chicken and Olive Fry-up

I used about 2 cups of roughly chopped chicken, but you could use a little less or a little more. 
2 cloves of garlic, minced
12 pitted green olives, chopped
A small onion, chopped or sliced
A couple of anchovies, chopped - I always have a few tins of anchovies in my cupboard.  They aren't exactly local, but they add so much flavor, and you don't need many of them to make a big difference.

In a large frying pan saute all ingredients together with some of the oil from the anchovy tin, or a little olive oil, until chicken is beginning to brown and crisp.  Add cooked pasta and toss together. I used a pound of fetuccine, but any kind of pasta would work.  Hugh also suggests cooked Puy lentils, but I felt like pasta.  He also says that he likes to serve it with a dressed tomato salad and that it can work as a cold dish too.  My children liked it both hot and cold.


The next night was Tartiflette.  Another Hugh creation.  This is one of my regular dishes.  It is extremely versatile.  I have used bacon, venison, pork and of course chicken in it.  I used up the last of the onions that I bought at the farmer's market last fall on this, so my onions had better start growing! 

Tartiflette

About 2 cups of leftover chicken, roughly chopped
2 onions, sliced
2 medium potatoes, about 1 1/4 lbs.
Scant 2/3 cup of heavy cream
About 1/2 lb of cheese - I usually use 1/2 medium cheddar, 1/2 mozzarella, sliced

Heat some olive oil in a frying pan and add


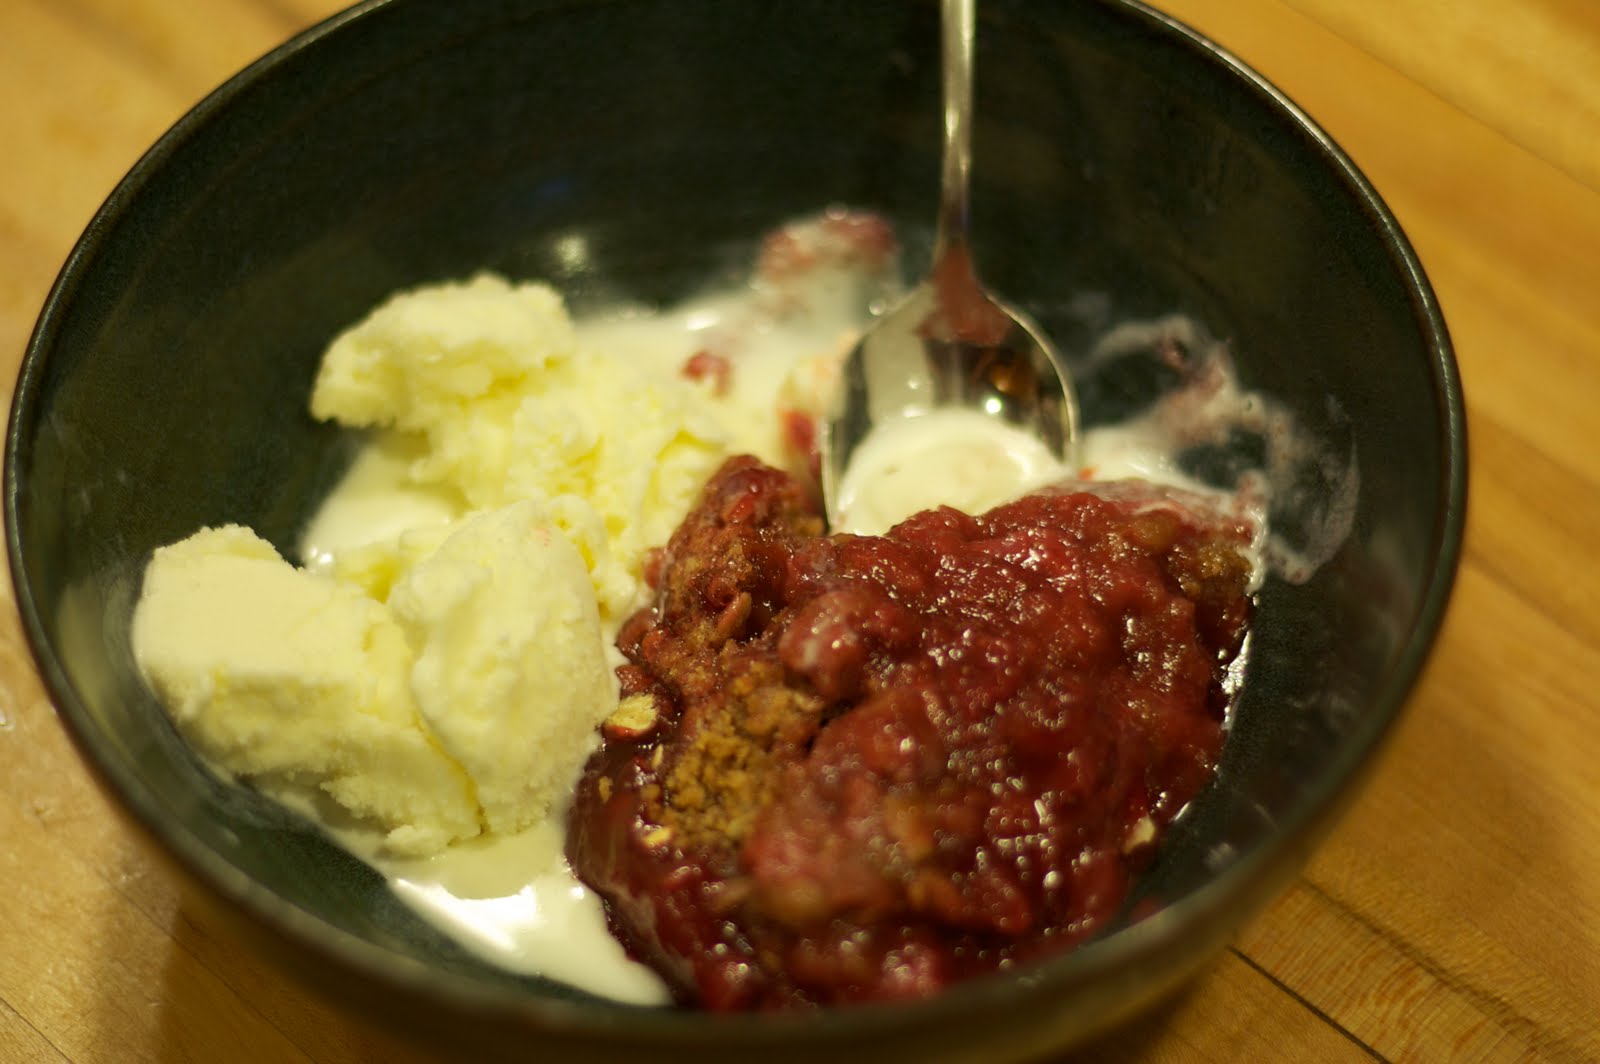
The last thing that I made was good old vichyssoise.  This time I used chicken stock instead of pork stock. 

Happy cooking!

Strawberry Rhubarb Crunch

I picked strawberries with the girls this last week and we had a lot of fun.  We ate a whole bunch fresh, but I wanted to make something with them too.  I used a recipe for Strawberry Rhubarb Crunch, and I only changed it a little bit.  I used 1/2 a cup of butter instead of a whole cup.  I use organic butter, and that isn't cheap, plus I knew that 1/2 a cup would work since this recipe is very similar to my Apple Crisp recipe. 

Thursday, June 10, 2010

Vichyssoise

You may remember that I said I was going to make a chilled soup with the stock from some pork chop bones.  I came across a number of yummy cold soup recipes, but I decided on a recipe for vichyssoise.  I changed only a couple of things about this recipe.  I used pork stock instead of chicken stock - and I had just enough.  And I used sour cream instead of heavy cream at the end, because it was what I had on hand.  My picky five year-old pronounced it her FAVORITE soup.  Much to my surprise.    I know this picture leaves a lot to be desired, but I was half-way through when I remembered I needed to take a picture.  Just the thing for a hot day. My daughters sipped it out of big mugs the next day for lunch - it cooled them right down.

PS - I have run across this soup from time to time, but I still had to look up how to pronounce it - vee - see - schwaz!  Or you could just call it Cold Potato and Leek soup.  :o)

Tuesday, May 25, 2010

Morels!

I forgot to tell you about my morels!  A few weekends ago we went mushroom hunting with the WI Mycological Society.  We had looked for morels before, but never had success.  We wanted to go on this foray just to see someone find a morel so we could look at it in place and figure out exactly what they looked like in situ.  We actually ended up finding some ourselves!  Hooray!


We were so excited!  We are probably going to spend every morel season for the rest of our lives looking for morels.  Beginners luck, I am sure, but so exciting!


Anyway, we took them home and fried them up with some butter.  Absolutely wonderful!!!  I looked through a whole bunch of recipes first, but decided to go with simple for our first time.


The top mushroom is a Pheasant Back.  It is edible, but not supposed to be that great.  We didn't end up eating it.  The morels were too wonderful to compete with.  Always make SURE that you know what you are eating.  That is one of the reasons that I joined the mycological society.  I have some great guidebooks, but that is no replacement for someone who actually KNOWS.  I can hardly wait for morel season next year!

Dining alfresco


I love eating outside, and in the spring, summer and fall we eat outside all of the time.  I was planning a picnic, but we ended up eating these at home, which was probably a good thing considering how messy they are.  I used this recipe for BBQ ribs and it was very easy and very, very good.  I didn't even change the recipe for once.   


We ate hamburgers outside the other day too....

With a tall cool glass of a strawberry drink I mixed up for something different.  All I did was mix some strawberry syrup with water until I liked the taste.  Super simple.

We had friends over a couple of nights ago and made pork chops on the grill.  We are having a heat wave in Wisconsin right now, and it is too hot to cook inside.  I kept it simple and just put salt and pepper on both sides of the pork chops.  Then my husband, the grill master, put them over indirect heat for 20 minutes and about 4 minutes per side over direct heat.  I also cut up some russet potatoes and put them in a foil pouch with some sea salt and olive oil.  Those went on the grill over direct heat, for about 30 minutes.  Added some popovers and salad.  Good friends, good food, very wonderful time. 

The next night we cut up the remaining pork chops and made sandwiches with the leftover hamburger buns.  Potatoes again.  Nice cool meal for a beautiful night. 
I am going to use the pork chop bones for a stock.  I just need to use the burner on the side of the grill and it rained today.  That was really nice for cooling things down a bit, but it was still too hot to cook outside.  Tomorrow.  I think that I will make some kind of cold soup.  Hmmm....

Venison Round

Once again, I didn't take a picture of the first night's meal.  But here is what I did:  I thawed out a venison round roast and cut it into pieces about 1 1/2 inches thick.  I trimmed off all of the silverskin and excess fat and then put them between two sheets of plastic wrap.  Then I pounded the crap out of them with a meat mallet, dredged them in flour and put them in a frying pan with a little olive oil.  I cooked a few minutes per side until medium-well done.  I had never tried this with venison before and I think that I would do things a little differently next time.  I think that I would dredge the meat in a beaten egg first and then in cracker crumbs instead of flour - just to give it a bit more texture.  Then I think that I would only cook them to medium-rare.  I served them with salad and bread.  They were pretty good, but like I said - I will do things differently next time. 

Next night - I cut up the venison and stir-fried it with garlic and veggies.  I started the rice first, and then chopped up all of the vegetables.  I used kale, beet greens and winter onions.  I chopped the garlic very fine and kept it separate.  Then I heated about 2 tsp of olive oil in my wok (you could use a frying pan instead) and added just the garlic. 


I stir-fried the garlic for about 30 seconds before adding the vegetables.  After these had wilted I added the meat - I added it last because I didn't want it to overcook.  When it was heated though I served it on a bed of rice, with roasted asparagus and popovers.

Yum.


This is one of many recipes that I have used for popovers.  This is the one that I grew up with and it is always a hit.

Popovers

1 cup bread flour - this is one recipe that I haven't gotten to work with wheat flour yet - but I will keep trying.
1 cup milk
2 TBL salad oil - I use a bit more than this.
2 TBL sugar
1/4 tsp salt
2 large eggs

Mix everything and beat really well with an electric mixer (very, very well - you want to get air in there!).  Pour into a very well greased popover pan (I used a muffin pan for years - it works fine - but only use eight of the cups).  Bake at 400 degrees for 30-35 minutes.

I like to put butter and jam on mine, but they are great plain too!

Monday, May 24, 2010

Tis the season - for Rhubarb and Asparagus!

So, once again this post is late.  I wrote it on the 12th and took a picture of the rhubarb streusel, but I didn't get a picture of roasted asparagus until the 18th (even though we ate it almost every night), didn't post it until now, and now asparagus season is over.  Although, if you cut back your stalks later in the year, they will produce some new delicious shoots for you - don't overtax the plant though.  


We were recently visiting family and Jake's aunt had made this great rhubarb streusel.  I just had to have the recipe.  Now that the rhubarb in my garden is finally big enough to pick I am going to give it a try!

Rhubarb Streusel     (double for 9x13 pan)

2 eggs
1 cup sugar
3 cups rhubarb (cut-up) - I added a bit more rhubarb - I had picked too much from the garden.

Beat eggs and sugar, add rhubarb.  Mix and put in greased 8x8 pan ( I must confess that I didn't grease the pan and it turned out fine).

Mix like pie crust and sprinkle over rhubarb
1 cup whole wheat flour
1/2 cup brown sugar
1/2 cup butter

Bake at 350 for 45 minutes.


I think that next time I am going to reduce the sugar a little.  I added more rhubarb, and since I didn't have much experience with the recipe I added the amount of sugar recommended, but it was still a bit sweet - I thought.  I will keep you posted.


The other thing which is coming up in my garden, which I have mentioned before, is asparagus.  Please, please, please buy your asparagus fresh.  The stuff from the store is almost totally worthless.  I am not just saying that because I grew up on a produce farm and we grew asparagus.  I crave it in the spring and since I haven't been able to find it around here and my garden cannot keep up with the demand I recently caved and bought some from the store.  Yuck.  Ick, and Phooey.  It was tough, starting to fern out and generally awful.  Find a farmer near you who grows it.  Granted, not all farmers are equal, but I bet it will be better than store bought!  Since I neglected to post a photo of roasted asparagus in my previous post, I will do so now.  Happy eating!

Tuesday, May 11, 2010

System Cooking with Salmon

I forgot to take a picture of the whole salmon fillet that we cooked for the first meal.  Use your imagination.  :o)   I had a sockeye salmon fillet that was about 1.75 lbs.  We seasoned it fairly lightly with my version of the Potlatch Seasoning that you can buy at Williams-Sonoma.  We bought it once and I liked it so I just read the ingredients on the back and mixed up my own.  Here are the ingredients.  I have no idea how much of each spice I put in, but I added them in decreasing amounts:

Kosher salt, paprika, crushed red pepper, chili pepper, oregano, basil, coriander

It also says that they add safflower oil, but I don't.  Anyway, place fish on some aluminum foil,  and sprinkle lightly with the seasoning.  Grill over medium heat until the fish flakes easily with a fork.  Don't overcook!   Serve with rice and roasted asparagus and fiddleheads (if in season).   Don't eat too much - you will want plenty of leftovers (and besides, salmon isn't exactly cheap!) 


The next night I made omelets.  I took the leftover asparagus, fiddleheads, and some of the rice and salmon and added some chopped winter onions from the garden (you could use a couple of scallions instead - basically the same thing).   I sauteed everything together until the onions were cooked through and then set to the side.

I love omelets and I usually make them with milk, but I recently saw a Jamie Oliver video where he fixed them without milk.  If you have never made omelets before or even if you have, watch the video.  It isn't very long and he does a great job of explaining how to make them.  I made them exactly the way he does in the video.  Three eggs, pinch of salt, a little freshly ground pepper, whisk well, pour into a hot pan, tilt and cook, add the salmon mixture, sprinkle with some cheese, fold it over and serve.  Mine didn't fold over as nicely as his, as I am sure you can see, but omelets are a great way to use up leftovers.  Jake has informed me that soup season is over.  I am not so sure, but over the summer I usually use up my leftovers in different ways other than soup.   


The third night we had a salmon pilaf.  I didn't have much asparagus left, but I had a bit, so I chopped it up fairly small and put it into the pan first with a bit of olive oil.  While that was cooking I chopped up three stalks of celery, three winter onions (scallions) and a couple of handfuls of kale and flaked the remainder of the salmon.  When the asparagus was cooked through I added the rest of the rice, vegetables and salmon.  I would have added some garlic, but I am currently out (gasp!).  I cooked together for a few minutes and then stuck it in the oven at 350 degrees for about 20 minutes.  You could skip this step and just saute it until the vegetables are cooked through.  I just felt like an oven baked pilaf that night.
 

Blackened Catfish and Fiddleheads

Some friends of ours gave us some catfish, so I decided to try a blackened catfish recipe.  I pretty much left this recipe alone, except for cutting the cayenne pepper in half.  I served it with rice, but it was still a little too spicy for my kids.  Jake and I liked it, but I ended up scraping off most of the seasoning so that they would eat it.  Oh well. 


It is asparagus and fiddlehead season around here.  Yea!  I have a ton of ostrich ferns growing in my yard, and I always knew that you could eat the tightly rolled fern heads (fiddleheads), but I hadn't tried it until last year.  I always meant to, and then I would forget about it until the ferns were too big.  Last year, I forgot, but then I just snapped off the ferns, and new fiddleheads formed.  I tried boiling them like asparagus, but they absorb a lot of water and kind of taste mushy.  Ick.  This year, I tried roasting them with olive oil and some coarse salt.  Yummy!  Isabela loves them and Maya thinks they are OK.  It is kind of funny because Maya loves roasted asparagus and Isabela think it is OK.  It works out well because this time of year I am usually roasting both together.

To roast asparagus or fiddleheads:  Preheat oven to 450 degrees.  Place fiddleheads and/or asparagus in a single layer on a cookie sheet.  Drizzle with olive oil  and sprinkle with some coarse sea salt.  Roast for about 8-10 minutes, until tender but still with some firmness.  Sprinkle with some Parmesan when they come out of the oven. 


Venison Loin

Alright.  So once again, I decided to combine a couple of recipes.  Hugh Fearnley-Whittenstall is one of my favorite sources, so I owe him for most of this recipe.  Then I also came up on this video which showed another way of making venison which I hadn't tried before, so I had to jazz it up a bit with that too, although not nearly as fancy as his.  The result was phenomenal, and definitely something that I will try again!  Here is what I did:

First, I cut my venison loin into noisettes about 3/4 of an inch thick.  Then I sprinkled a little salt and some freshly ground pepper on each side.  I put them into a hot(!) pan in which I had melted a bit of butter and added some olive oil.  I seared them for about a minute on each side (I like my venison pretty rare).  Then I added a small glass of whiskey (I would have added brandy, but I didn't have any) and set fire to it with a match.  After the flames died down I transfered the meat to a warmed dish.

Using the same pan that I cooked the venison in, I added a few TBL of red wine (I had some raspberry wine leftover) and deglazed the pan over medium heat.  Then I added about 3 TBL of red currant jelly and reduced for a few minutes.  Then I added 1 TBL of cream, reduced a bit more and poured over the venison.  You could obviously do this with a beef loin as well.


Potatoes

I used some small Russet potatoes and boiled them until easily pierced with a fork.  Then I crushed them with a glass and put them into a frying pan with three cloves of crushed garlic and some butter (enough to keep the potatoes from sticking to the pan).  I had some kale that had overwintered in my garden and was starting to put out new leaves, so I stole those, chopped them coarsely and added them to the potatoes - probably a couple of handfuls.  I cooked until the kale had wilted and you could smell the cooked garlic.  Serve with the venison.  Yum!


The next night I cut up the venison, added some more kale and (after boiling until easily pierced with a fork) some fingerling potatoes.  I had bought many pounds of them at the farmer's market last fall and as you can see I either need to use them up or plant them.  By the way NEVER eat potato sprouts or any green part of potatoes.  Potatoes belong to the deadly nightshade family and the green parts are poisonous. 


Then I just cooked it all together in a pan for a little while and we had a wonderful hash.  Don't forget to add all of the leftover sauce too.


The third night I took the leftover hash and incorporated it into an egg dish.  This is one I made up completely and I don't remember how I did it.  I forgot to write it down, but I imagine that it was something like this:

I think that I had about a cup or maybe two of hash leftover.  Add three beaten eggs and mix together.  Add 1 cup of warm whole milk.  Stir and sprinkle the top with chopped kale and 1/4 cup Parmesan.  Cover and bake in a 325 degree oven for 30 minutes.  Remove cover and bake for another 10 minutes or until set in the middle and slightly browned on top.  

That is my best guess as to what I did.  I will try and make something like it again soon.  Good luck!   


Monday, May 10, 2010

Pancakes


I told you about how my husband and my eldest daughter argue about whether pancakes or waffles are better, and so they have to switch off weekends.  I gave you my recipe for waffles first because I almost always make the same recipe, but I usually make different recipes for pancakes.  Here is one of them (from "The Joy of Cooking" with minimal changes), topped off with sliced bananas and strawberry syrup:

Pancakes

Mix together dry ingredients in a large bowl:

1 1/2 cups all-purpose flour (I use 1 cup wheat and 1/2 cup white)
3 TBL sugar
1 1/2 tsp baking powder
1/2 tsp salt

Mix wet ingredients together in a medium bowl:

1 1/2 cups milk
3 TBL butter
2 eggs
1/2 tsp vanilla

Pour the wet ingredients in with the dry and gently whisk together.  You could add dried or fresh fruit, nuts or other additions at this stage.

Pour  1/2-1 cup (depending on how large you like your pancakes) of batter into a medium-hot pan.  Cook until bubbles rise to the top and start to pop open and golden brown underneath.  Flip and cook until golden brown  on other side.    

Eat!

Ham and so on

The whole family loves ham, and there is something about the smell of ham baking in the oven on a cold day that is magical.  Of course, it stays cool in Wisconsin a lot longer than in other places, and I fixed this a month or so ago - sorry again for the delay, it has been a crazy upside-down spring around here.  So, for the first night we had ham, baked potatoes, bread and salad.  I hardly ever take pictures of the salad, but we eat it almost every night.  We buy the big boxes of organic mixed greens at the grocery store when we can't get it locally, and we will start buying it locally again very soon!  Our local grocery stores don't carry it in the big boxes and the small bags are so expensive, but since my husband works in Madison, he stops at a grocery store that is right across from his office, and they carry it.  I have often noticed that I can buy bulk so much cheaper in bigger cities.  So - when you are taking an outing to a larger city - stock up!  I buy rice, olive oil, salad and sometimes cereal there.  Oh - and some really great specialty cheeses.  We have some great cheeses at the cheese house in town here, but they have some really great ones in Madison from all kinds of wonderful cheese makers from Wisconsin.  I highly recommend Crave Brothers (Petit Frere) and any of the Carr Valley cheddars.  Mmmm.  There are not cheese that you just eat.  They are cheeses that you savor in small amounts.  They are too expensive to do otherwise, but make a great (and healthy!) treat. 


I am very lazy about making hams.  I usually stick them in my dutch oven (still frozen if I haven't been organized enough to thaw them out in the fridge first).  Then I turn the oven on to 225 or 250 and let it go for a couple of hours or so.  About an hour and a half before I am ready to serve it,  I turn the oven up to 350 and stick in some potatoes.  I just scrub them, rub them with a bit of butter and stick them in.  Then everything can come out at once.   Easy peasy! This served four adults and two kids and there were still leftovers!


The next day we still had company and so I made fried ham sandwiches for lunch.  This was very easy too.  You slice the ham into 1/4 slices or so and put them into a dry frying pan.  You don't need any additional fat - there is enough on the ham.  Cook at medium heat until warmed through and beginning to brown.  While you are waiting for them to cook, you can slice the bread and toast it (if desired) spread bread with mayo and add some cheese slices - we like muenster or cheddar.  Put the ham slices on top of the cheese, top with some lettuce and you have got a wonderful simple sandwich.


We also fried up some potatoes in another pan.  This was simple too.  I just added some ham fat to the pan, then scooped the leftover baked potatoes out of their skins (and I am sure that you know by now that I made potato skins out of them!) and tossed them in too.  I cooked them until warmed through and starting to get crispy too, on medium-high heat.  This served eight adults and four children for lunch.  And we still had the bone and a little bit of meat left.  So what did I make?  All together now:  SOUP!

I made the U.S. Senate Bean Soup again, with only a couple of modifications.  I just used the ham bone (with attached meat) and trimmings instead of the hock/shank.  I still ended up with about a cup and a half of meat after picking everything apart after simmering it for a couple of hours.  We soon had more company, and this soup served four adults, plus the two kids, and then just the four us for two more meals.  I usually serve it with bread.  Enjoy!

Thursday, May 6, 2010

White Bean and Lamb Soup

I found this recipe for White Bean and Lamb Soup that I have been meaning to try.  I have made a barley and lamb soup before that I liked, but I just wanted something a little different this time.   With my leg of lamb leftovers, this is exactly what I did.  (Remember that post?  I have had a super busy spring and this is the first time I have gotten a chance to post in over a month!) It was great and I think that it will probably be my top choice for lamb leftovers from now on.

I did, of course, make several changes to the recipe, mainly eliminating things because I didn't have them.  I first used the bone (with any meat that didn't come right off) for a stock.  I simmered it for a few hours.  You could do this in a crock pot and just leave it overnight, then take out the bone and throw in the rest of the ingredients in the morning - leave it to simmer all day and ta-da!

So - instead of chicken broth - I just used the lamb stock.  And I used the leftover meat from the leg of lamb rather than ground lamb.  I also replaced the vegetable that they suggest with the leftover vegetables that I had cooked with the leg.  I didn't have any spinach, feta cheese or tomatoes, so I skipped those, but I did add some celery and some more carrots.  All in all - yummy!  Soups are so forgiving.  I improvise with them all of the time.  If you don't like an ingredient - replace it with one you do like.  Just try and replace veggies with veggies etc. at first until you get the hang of substitutions and additions.  Happy cooking!

Tuesday, March 23, 2010

Know Your Ingredients....Sugars

So..we all like sugar. For many of us, naturally sweet foods such as fruits somehow are not sweet enough. It s possible that super sweetened processed foods have become the "norm" for our spoikled taste buds. Here may be a reason why. Be a food detective and scan the list of ingredients on packaged food.....anything from cold cereals to ketchup to bottled salad dressings. It may surprise you to see that besides sugar, brown sugar and corn syrup, many of the listed ingredients end in "ose". Anything ending with the suffix "ose" is a sugar. There is sucrose (table sugar), maltose, dextrose, lactose (milk sugar), glucose, fructose (fruit sugar) and galactose. There is also molasses, dried beet juice (a disingenuous attempt to disguise white sugar made sugar beets), dried cane juice (another disingenuous attempt to disguise cane sugar). It is possible that over 50% of the ingredients in many packaged foods are sugars. You may also find that 'modified corn starch' and high fructose corn syrup' is in just about everything...really. Modified corn starch is not exactly a sugar but is metabolized somewhat similarly. I want to know why I need so much sugar and corn syrup in my ketchup!!!!

Wednesday, March 3, 2010

Leg of Lamb, etc

 
Another "system cooking" adventure with Laura.  I started out with a leg of lamb on Sunday.  This worked out well since I cooked it for 5 1/2 hours in the oven and basted it every 1/2 hour for the last two hours.  I really didn't need to do that.  But it came out rather lovely, I think.


Anyway.  I combined a couple of recipes from some of my favorite cookbook authors:  Hugh Fearnley-Whittingstall and Jennifer McLagan, and then added my own twists.  I can't seem to help it most of the time.  I first cut up a bunch of veggies: carrots, onions and potatoes and put them on the bottom of my dutch oven.  I also used turnips, but for some reason, they tasted awful.  I love turnips, but either the ones I had were not good, or they just don't go well with lamb.   So - skip the turnips.  Cut up as many veggies as will cover the bottom of the pan in a double layer, according to your preferences - I tend to use a lot of carrots if I have them - but we run out of them quickly around here.  Then I stuck my knife in the lamb several times, peeled and cut garlic into large slivers, roughly chopped some anchovies and stuck the garlic and anchovies into the lamb.
 

Then I put the lamb in on top of the vegetables, filled the pan with about an inch and a half of water, poured about half a bottle of white wine over everything (I would have used a whole bottle if I had one), and stuck it in the oven at 350 degrees F for two hours. I was going to use lamb stock instead of water, and I had some in my freezer, but it was in a Ziplock and when I opened the fridge door after letting it defrost in there overnight, out came the lamb stock.  Oops.  There was a hole in the bag and I foolishly didn't put the bag in a container.  Messy, messy!  Not very thrifty to waste it, and very time consuming too.  After cleaning my fridge thoroughly, and after the two hours had passed, I took off the cover, basted the leg, and turned the temp down to 300 degrees F.  I basted the leg every half hour for 2 1/2 hours - don't replace the cover.

The meat was really tender and wonderful.  The vegetables were fantastic and it is not a difficult recipe at all.  It is a little time-consuming, but just the cooking part, and it only takes a couple of minutes.  I suppose that if you had a very large crock pot this could work in there too. 


Next night - I made a kind of hash with the leftover potatoes and some of the meat and onions.  I didn't add any kind of oil or fat.  There was enough on the veggies and meat already to cook it nicely.  My husband loved it.  He put sour cream on it and devoured.  The kids weren't quite as sure - even with the sour cream.  I am not sure why - to many vegetables I suppose.  Grin.  I forgot to take a picture of the hash, but it looked like a normal hash, so you aren't missing much.


Last night - Naan and rice and lamb.  Another favorite dish around here.  I love this naan recipe.  I don't tinker much with this one.  I used 2 1/2 cups of whole wheat bread flour and 2 cups of white.  I think that I will increase the wheat flour next time.  I had never made it that way before, and wanted to make sure that it was still going to be as great as usual.  The other change I make is to roll out all the dough inside, and then bring it out to the grill and brush butter on before I put it on the grill rather than after.  I have cooked it inside on a very hot pan before too and it has worked out just fine.  Naan is a little time consuming, but very worth it.  We will have plenty of naan for the next couple of days.  One time saver would be to mix it up in the morning and leave it out all day if you ave a cool kitchen, or stick it in the fridge if you have a warm kitchen.  Or you could mix it the night before too.  Then take it out 1/2 an hour or so before you want to use it.  I would put it on the stove top next to where you are cooking your rice and lamb so it warms up more quickly.  

Rice:  I like parboiled rice myself.  I am trying to accustom myself to brown rice, but so far I just don't like it.  Oh well - win some, lose some.  I usually cook about two cups of rice with four cups of water.  Bring to a boil, then reduce to a simmer.  When you can see the little bubble holes in the rice and it looks like the water has been absorbed when you stir it, it is done.  This usually takes around 15-20 minutes.

Lamb:  All I did for this was tear off a bunch of leftover lamb from the leg bone with my fingers.  I kind of shredded it a bit too so that it was in bite-sized pieces.  Then I put it directly into a cast iron skillet (my absolute favorite pan), again there was enough fat on the lamb meat to allow it to crisp up nicely without any additional fat added.  I was going to add some kind of vegetable to this, but I didn't have any peppers and I thought that salsa would make it too fajita-like.  I didn't even have any salad around here, which is unusual.  So, we went vegetable-less for one night and my five year old told me that it was the best supper I had ever made.  Aaargh. 


I put teriyaki sauce on my rice, but my husband loves soy sauce.  Now - on to eating.  My favorite way it to tear off a piece of naan and use it to grab some rice and meat, then take a bite.  The ultimate finger food.  It was fantastic, but I have to say, it could have used some vegetables....
Now, three guesses as to what I am making tonight.  SOUP.  Of course!  I haven't made it yet, but I think that I will do a separate post later.  I am thinking about a lamb and white bean soup, but we will see, you never know what I will do - it is a mystery even to me!

Tuesday, March 2, 2010

Strawberry (or insert fruit of choice here) Syrup

I am always looking for fun alternatives for our weekly pancake/waffle fests around here.  Even though we live in Wisconsin and maple syrup is local, it still isn't exactly cheap.  Don't get me wrong, we love it and use it a lot, I just like something a little different and a little less expensive every once in a while.  I have been meaning to try making strawberry syrup for a while now, but the recipes I have seen always call for corn syrup or waaaaaay more sugar than I am comfortable with.  So, I decided to wing it.  I make a bunch of strawberry juice every summer with my steam juicer.  This is not a cheap kitchen toy, but I make gallons and gallons of juice every summer and we drink it all year.  It is super easy to use and my friends love it too.  In fact, if I had to buy one again - which I won't because it is extremely sturdy, I would split the cost with my friends and we would rotate it.  It already makes the rounds anyway!   The strawberry juice is too concentrated for us to drink straight, but it is wonderful mixed with lemonade.  We also add vodka sometimes for a drink we call a "Bloodshot", but that is a different story.  :o)  Anyway, here is the recipe that I came up with:

1 cup strawberry juice to 1 cup sugar.  Cook at a good simmer until thickened. I think that I cooked mine for 45 minutes or so.  Keep in mind that it will thicken up a good deal when it cools down.  You basically just want it to be noticeably thicker than it was when you first started cooking it.

Pretty difficult huh?  The family gave it a thumbs up - whoo-hoo!

You could use any juice for this - some may require more or less sugar.  I initially used a little more sugar in mine and then had to dilute it with more strawberry juice because it got too thick.  Let it cool in the bottle at room temperature before refrigerating in order to check its viscosity.

The juice is very local, the sugar...not so much.

PS- This is also a great way to spread your wine-making out over the year - if you are into that kind of thing.  I am.  Maybe I will do a post on that sometime.  :o)

Good luck!

Leftover Stuffing and Friends

Apple Pork Chops with Stuffing is a recipe that I have been meaning to try for a while.  I have lots of leftover stuffing from my Christmas turkey, and I looked at a lot of recipes for using up stuffing.  We like it just plain, but that gets old after a little while.

I love pork chops and I am always able to get a couple more meals out of them, so here we go!

First night - Apple Pork Chops with Stuffing.  These were fantastic!  I was a little skeptical about the apple pie filling - I used some that my mother in law had canned last fall- but it was really good.  Also, instead of the stuffing from a box (I avoid boxes if at all possible), I of course used leftover stuffing from the freezer.  If I can get my in-laws to agree, I will post the super-secret stuffing recipe sometime.  Please guys?  Anyway - it turned out wonderfully. 


Second night:  Pork Fried Rice.  This is my go-to recipe for leftover pork.  It is a family favorite.  I usually omit the scallions and use a chopped medium onion and a couple of chopped carrots instead.  I saute the carrots, onions and pork until the vegetables are soft (you probably don't need to add any oil for this - the pork fat just from the pork will be enough), then I remove them and cook the rice and eggs according to the directions.  Remember to heat the oil BEFORE adding your rice.  Otherwise the rice soaks up the oil and tastes greasy. 

The third night:  Soup.  What else?  It seems to be the inevitable end of most of my meals.  For this one I took all of the leftover bones from the pork chops, placed them in a stockpot and barely covered them with water.  I brought the whole thing to a boil and then reduced the heat to a simmer for a few hours.  This could be done in your crockpot too - just put them in the morning and let them simmer away all day.  I then strained the stock into a bowl, put it back into the stock pot and added all of the leftover stuffing and sauce from night #1.  I then picked all of the meat off of the bones and added it back to the stockpot too.  This was a pretty good soup, but it was a little sweet for me - probably because of the apple pie filling.  I think that next time I will add some extra celery and maybe some bread to damp the sweetness.  Or maybe I will just cook the pork chops over regular sliced apples.  Hmmm.  We'll see.  Sorry I forgot to take a picture!  Maybe next time.  :o)

Happy cooking!

Sunday, February 21, 2010

Potatoes, Potatoes and Potatoes!!

Super Simple Basic Recipee #2 Mashed Potatoes, Baked Potatoes and Oven "Fries"

OK, Laura and I seem to be moving forward on a potato thing, but you cannot get much thriftier than basic potatoes. There are a good source of complex carbohydrates and vitamin C (especially if you eat the skins). Here are some super good, super simple ways to make them.

Homemade Mashed Potatoes (makes 2 very large servings)
*1 pound potatoes (any non waxy type such as russets, idaho, yukon gold etc. Not small red potatoes which are better for cold potato salads). Peel skins and cut in quarters. Place in lukewarm water in a medium saucepan with about 1/4 tsp of salt
*Boil on the stovetop about 25 minutes...maybe a bit longer until a fork easily goes through a potato chunk
*While the potatoes are cooking, get the rest of the ingredients together:
1/3 cup milk, 1 tablespoon butter and salt (to taste..add last). Get something to mash the potatoes with initially and your hand held mixer out.
*When the potatoes are done, quickly drain the water (you don't have to be religious about every drop), add the milk and the butter and smash the potatoes a little to break up the big pieces. Then beat them with your hand held mixer until smooth. Add 1/2 tsp salt initially, more later if you want.
*Serve immediately

This is just the super simple basic recipe. You can easily double, triple, quadruple this recipe. You can add a bit more milk or butter. You can replace the butter with a tablespoon or so of cream cheese (this reduces the saturated fats by quite a bit) or you can add several tablespoons of shredded cheddar cheese. You can add a tablespoon of shallots, fresh chives, parsley or green onions at the end.
You can use this basic recipe to refill Laura's hollowed out skins for twice baked potatoes. Carefully remove the insides leaving 1/4 inch of potato and skin and use the mashed potato recipe to refill the skins. Rewarm at 350 F. for 20-30 minutes.


Baked Potatoes
This is why we always eat the skins!!
*Scrub the outsides of a baking type potato (non waxy types) under cool water
*Dry them well, poke several holes in the potatoes with a fork
*Pour a little canola oil into your hand and oil the surfaces of the potato, then roll in salt (I really like coarse or kosher salt)
*Bake for 50-60 minutes in a 350 F oven
(This is also a special way to make twice baked potatoes)

Oven Fries
*Allow a medium sized potato per person, minimum
*Scrub the outsides of your potatoes under cool water
*Cut in half lengthwise, then cut the halves lengthwise. You will now have four pieces which you will slice lengthwise in half again.
*Place in warm water for 10 minutes (this makes the outsides crispy)
*Remove from water and dry with a clean towel
*Toss with 1/2 tablespoon or so of canola oil per potato and lay out in a single layer on a cookie sheet.
*Sprinkle with salt (I really like coarse salt)
*Bake 400 F for about 15-20 minutes

I love these. They have no artificial preservatives, no saturated fat and taste divine. Coarse salt really does taste better on these and can be found in your grocers , usually labeled kosher (least expensive) or specialty (most expensive) Many times, it's the little things that make the difference!!!

Tuesday, February 16, 2010

Potato Skins

For this I have to thank Simply Recipes.  Without the beautiful photography on that blog, I may not have made these and that would have been a shame.  I, of course, had to put my own spin on these.


Here is what I did:

1.  Bake some potatoes - I usually use Russet potatoes, wash them, dry them and smear them with a tiny bit of butter.  I have found the easiest way to do this is take a baggie on my hand, pinch off a bit of butter and proceed to rub it all over the potato (or pan - if I need to grease a pan).  I know that many people pierce their potatoes with a fork to keep them from exploding, but I come from a potato growing family and we have never had that problem.  I bake them at 400 for about 45-60 minutes, or at 325 for as long as I feel like it.  :o)  It is completely possible to over-bake potatoes, and I have done it a few times, but the insides are fine, it is just the skins that aren't so tasty anymore. 

2.  Serve as baked potatoes.  My family doesn't usually eat the skins of their baked potatoes anyway, so this doesn't matter.  You could also cut them in half and scoop out the flesh for mashed potatoes, or hash, or a number of things.

3.  Scoop out any remaining flesh, and save for another purpose.  I scoop almost all of it out instead of leaving a 1/4 inch or so like most people because I like the skins to be crunchy.  My skins also don't look nice and neat like Simply Recipe's, but they are still very tasty! 

4.  Heat up the oven to 450 degrees.  Place skins on a rimmed cookie sheet.  Brush or spray with olive oil - or whatever oil suits you - on both sides. 

5.  Bake for 15-20 minutes or until crunchy, flipping halfway through.

6.  Take out of oven and top grated cheese and if you want, some crumbled ham, bacon, chicken, whatever you like.  Put back into oven until cheese is bubbly - a couple of minutes.

7.  Remove and serve with sour cream and BBQ sauce.  At least, that is what I like to have it with!

8.  Enjoy the oohs and ahhs from your family and friends.

Sunday, February 14, 2010

Super Simple Recipe #1 ..Medium White Sauce for Mac N Cheese and More

White Sauce for Mac n Cheese, Chicken Pot Pie and More


Medium White Sauce
2 Tbsp butter …….Melted in a medium saucepan over medium heat until just bubbly
2 Tbsp flour ……… Add and stir quickly to blend…Cook one minute
¼ tsp salt
1 cup milk………….Whisk in with a wire whisk or a fork ¼ cup at a time
Cook until thickened….about 3-5 minutes stirring occasionally

This is a very easy basic recipe that can be altered easily as long as you keep the ratio of flour and fat the same. To reduce saturated fats you can successfully replace the butter in a white sauce with 50% olive oil/50% butter. You can use skim milk, 1%, 2% or whole milk. You can also replace up to half of the milk with half and half or cream but do NOT boil it after as the cream will curdle. Warm the half and half/cream on the stove top or in the microwave (carefully!) then add to the rest of the sauce after it is thickened. I often use the cream variation of this sauce in making creamed soups. So with this basic recipe, you can make super simple Mac N cheese( see below), the inside of a Chicken Pot Pie(see below), or with some minor variations, creamed soups, gravies, Alfredo sauce and other delectable goodies. You can even make your own cream of mushroom soup to replace the stuff you by in cans!! Although, honestly, it probably won’t get as far as the casserole…it’s just that good. Creamed soups in a later post, Mac N Cheese for now!


For Homemade Mac N Cheese:
*To the medium white sauce recipe, stir in ½ to 1 cup shredded cheddar cheese (or cut up into thin pieces if you don’t have a shredder) until it is melted and the sauce is smooth. Then add…….*8 ounces of cooked and drained macaroni noodles (either whole wheat or regular. Any noodle that has some body; shells, spirals, wagon wheels etc). You can begin boiling the noodles right before you make the white sauce and they will cook for 5 minutes while the white sauce is cooking. It’s better if you don’t overcook the noodles

THAT”S IT, that’s all. My kids always called this Mac A Cheese……. It was a favorite for lunch or a super fast easy supper. Your kids will love it, especially if they are not used to the highly salted, over processed stuff AND...you can actually pronounce all of the ingredients in it. You can add a bit more salt if you think you need to, some course ground pepper , a little onion (like a tablespoon or so) or some leftover cut up ham, but you don’t have to. You can vary the cheeses in it. ( If you use strongly flavored cheeses like Parmesan or Romano, use less than a cup.) You may also put this in a casserole and bake it topped with crumbled crackers and a little cut up butter over the top, but again, you really don’t have to.


For Chicken Pot Pie (Chicken A La King as my mother called it)
To the white sauce, add 1 cup cut up leftover chicken, a chicken bouillon cube (I use a package of George Washington Seasoning..it boosts the flavor), 2 -3 Tbsp chopped onion cooked in a little oil for 2-3 minutes with one peeled and chopped carrot and ½ cup frozen peas (add them last because they cook really fast)

TA DA!!! THAT’S IT, that’s all. Serve over toast (easiest) or mashed potatoes (next easiest) OR if you want a real treat, divide into four oven proof bowls and place a square of puff pastry over the top. (super easy, but not super thrifty) Bake in your oven according to the puff pastry directions. If you are ambitious, place inside a pie crust. Now we are not talking easy, but we are talking good.

Thursday, February 11, 2010

Mmmm. Soup.


This is the first time I have made this particular soup and it is wicked good.  Seriously.  I got 'yums' from my picky eaters (and don't tell them this, but it has lots of veggies in it).  It is called 'U.S. Senate Bean Soup' and I got it from "Joy of Cooking".  It said something about how it has been on the menu at the Senate since dinosaurs roamed the earth.  There is a reason for that.  Gooooooood.  It called for a small ham hock, but there was nothing small about our pig and I have shanks which include the hock.  Another good reason to have an inventory - I was convinced that I had a hock in the freezer and without an inventory I would have been out in the freezing garage cursing and searching through the freezer.

So, I used the pork shank that I had, and after boiling it for a couple of hours I picked off the meat and only added a cup and a half of shredded meat back again.  This left me plenty of meat to work with for future recipes, one of the bones went to my dog with the rest in the freezer for to distract him when we really don't want him around.  Yay!  I also saved the fat off the shank.  I will use it instead of butter (cheaper too!) when I need to saute something and want the ham flavor - potatoes for example.  Keep tuned!

Here is the recipe for the U.S. Senate Bean Soup (slightly adapted from "Joy of Cooking"):
Bring the following to a boil and then reduce to a simmer.  Simmer together for a couple of hours or until meat is very tender and falling off the bone:

7 cups water (I needed 14 cups of water to cover my pork shank -so when the meat and bones were ready to come out I just took out 7 cups of water and then froze it to use when I want to make this soup again - without the hock/shank)
1 small ham hock 
1 1/4 cup white beans (I used navy beans - and they were too pretty not to take a picture of)

Remove ham hock and pick off the meat.  Add back to the pot. Add:

1 large baking potato, peeled and finely diced (I actually used the inside of a baked potato leftover from last night - reserving the skins for potato skins of course!) 
1 large onion (or 2 small ones!), diced
3 medium stalks of celery with leaves, chopped
2 (or more!) cloves of garlic, minced (this means cut up really fine)
1 1/2 tsp salt
1/2 tsp ground pepper

Whenever I have more than one thing that needs to be chopped/minced I use my food chopper (as seen in the picture) or my food processor.  It makes it worth washing if I am going to chop a few things with it and it makes the food prep go so much faster.  I have come to the conclusion that I am never going to be one of those people who can slice and dice and make it look effortless - plus they always seem to be able to do it evenly! I have a relation who can and I am always jealous when I see him smoothly cutting up veggies in the kitchen.  He is pretty handy with teeth too - he just opened up his own dentistry practice in Madison.  I, however, have grown to be content with my food chopper and processor along with my mediocre slicing abilities.   

Cook until potato is soft (about 20-30 minutes), then mash with a potato masher to make soup slightly creamy.   Stir in 2 TBL chopped fresh parsley.  I didn't do this, b/c I didn't have any fresh parsley.  Serve with bread.  Yummy!

This would be an easy one to do in the crock pot too.  I would put the beans and hock/shank in the crock pot all day on low, and then add the other ingredients 20-30 minutes before I wanted to eat.  Happy cooking!


Chili Mac and Beyond


So here ends the saga of the second pile of taco meat.  Hooray!  Actually all of these were pretty good.  I was just a little tired of the taco seasoning taste by the end.  First up is a variation on chili mac.  I just cooked a package of elbow macaroni (in retrospect, I should only have cooked half the box).  Then I put those in a 9x9 cassarole dish and topped with the leftover salsa and taco meat.  Then I grated some cheese, sprinkled it on top and baked it for about 25 minutes in a 325 degree oven.  That was pretty good, but I sent it in Jake's lunch - so I had to come up with something different for supper.  (Remember the two meals in a row rule?  BTW - Jake says he wants to be recast - he says he sounds too picky in my blog.  I told him that if he wasn't picky he wouldn't be portrayed as picky.)  Anyway.  I fried up some potatoes and then took the meat/cheese/salsa cap off, broke it up and sauteed it for a few minutes with the potatoes.  I forgot to take a picture of the final produce, but you get the idea. 


I still had the noodles to deal with.  I intended to make some kind of noodle pancake, but the elbow macaroni didn't want to stick together nicely like spaghetti do.  It still turned out fairly well though.  My five year old loved it.  I mixed a couple of eggs in with the noodles and broke up a couple of pieces of bacon that we had leftover from our waffle weekend.  Then I just sauteed the whole thing in some butter (or maybe bacon fat - I don't really remember).  So that was the last of it, and I don't think that I will be making tacos again for a while...